ISPF Editor - A Quick Reference Guide
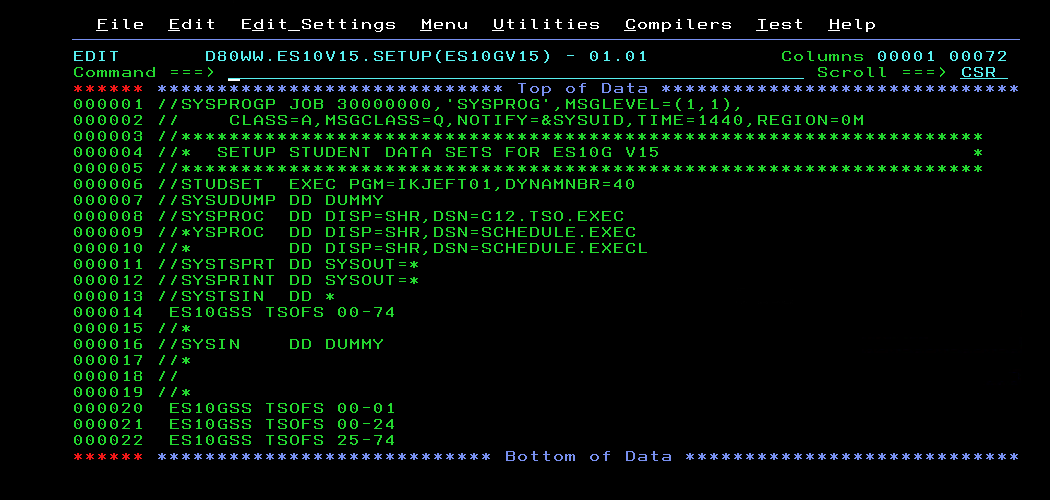
The purpose of this page is to enable you to use the ISPF editor quickly, utilizing a subset of the primary and line commands, as well as some of the keybindings.
Table of Content
- Getting Started
(provides recipes for creating/opening a data set or member for editing) - Keybindings
- Some Primary Commands
(entered at the "Command ===> " field) - Some Line Commands
(entered before a record in the prefix area on the left)
1. Getting Started
If you need to create a new data set from scratch, check out the following recipes:
Here is how to open and existing data set/member for editing
* Enter =2 on the command line (from any panel) to go to Edit Entry Panel

* Press Enter

* Under "ISPF Library", enter the following fields:
	- Project: ...
	- Group:   ...
	- Type:    ...
	- Member:  ... (leave blank for non-partitioned data sets)

* Press Enter
Tip
if you would like to see a list of members in your partitioned data set and choose the one to edit from that list, do these steps instead:
* Go to Edit Entry Panel (=2)

* Under ISPF Library, enter the following fields:
	- Project: ...
	- Group:   ...
	- Type:    ...
	- Member:  (leave empty)

* Press Enter (it will bring you the list of members)

* Tab to the member of interest

* press the E key (it will place the letter E in front of that member)

* press Enter
And another tip
when you know high level qualifier (Project) of a data set you'd like to work with, but not sure about its Group and Type, a handy way to list all the data sets that start with a certain high level qualifier is to:
* Go to Data Set List Utility by entering =3.4 on the command line

* Press Enter

* Tab to "Dsname Level" (aka high level qualifier) field and enter it

* Press Enter
Next, if you'd like to edit any data set from that list do the following:
1. For a data set that is not of type PSD/E
====================================

* Tab to the left of the data set of interest and enter E

* Press Enter (the Edit Entry Panel will appear)

* Press Enter again to start editing
2. For editing a member of a PSE/E data set
===========================================

First, you need to get a list of members of that data set:

* Tab to the left of the partitioned data set and enter E

* Press Enter
Now, when you have the list displayed,

* Tab to the left of the member you'd like to edit and enter E

* Press Enter
2. Some Keybindings
- F3
- Exits the editor or switches to a previously open data set (when more than one was loaded), automatically saves your work
- F5
- Repeats find without re-entering the character string (like the RFIND command)
- F7
- Scrolls up one page
- F8
- Scrolls down one page
- F12
- Exits the editor or switches to a previously open data set (when more than one was loaded), without saving the changes (the key should be configured for quit to function as described)
- PA1 (on an unmodified x3270 session, the PA1 key is Left Alt-1)
- Can be used to terminate TSO commands or CLISTs running under ISPF
3. Some Primary Commands
Note: the primary commands are not case sensitive.
- REC ON (or RECOVERY ON)
- enables UNDO
- UNDO
- undoes the last change. You can repeat UNDO to reverse changes, until the last SAVE
- SAVE
- saves the work
- CAN (or CANCEL)
- exits the editor without saving the changes
- CRE TABLE (or CREATE TABLE)
-
creates the member TABLE
if you need the new member have the contents of the current one (the one you are editing at the moment), don't press Enter right away, type c99999 in the line 1 prefix area and after that press Enter
- REP ADDR (or REPLACE ADDR)
-
Note: REPLACE is similar to the preceding CREATE command, but able to replace an existing member with data being edited (very handy at times) by entering c99999 in the line 1 prefix area before pressing Enter
- EDIT A
- brings the member A for editing (the original member remains in memory, to go back to it use the END or CANCEL command)
- FSOME STRING (or FIND ...)
- searches for the SOME STRING string.
- BNDS1 8
-
sets the boundaries to columns,
for example, BNDS 1 8 will set the boundaries to columns 1 to 8, this means that FIND and CHANGE commands will only apply to data within columns 1-8
to reset the boundaries to the whole record, use the BNDS command without operands - CXXXX YEAR ALL
- changes all XXXX to the word YEAR
- HILITEAUTO
- enables the coloring for language sensitive coloring
- COPY'D80WW.ES10V15.CNTL(TABLE)'
-
inserts the data from the TABLE member of the D80WW.ES10V15.CNTL dataset,
to actually make the insertion, let's say, right beneath the 10th line (somewhat similar to :10 read <filename> in vim), first tab to the line 000010 prefix and enter a, after that issue the given COPY command on the Edit's command line - COPYTABLE
- a variation on the previous command, this one is shorter and intended for cases when the TABLE member is of the same dataset
- TSO EX'TSOCA03.ES10.PDS(LITLGAME)'
- starts the LITLGAME REXX program from the TSOCA03.ES10.PDS partitioned dataset
- COLS
- brings/removes a ruler (column guide) at the top of the screen that will not move when you scroll up or down (the command acts similarly to a toggle switch)
- RES (or RESET)
- removes messages in the editing area and also all the rulers created with the cols line command, additionally, it unexcludes excluded records
- SORTNX A 3 15 A 18 31
-
sorts the records
the parameters used in this example mean the following:NX - sort only non-excluded lines (with the xx line command), the excluded records will remain where they are;A 3 15 - use ascending order for columns 3 to 15 (for example, these columns could be used to hold last names);A 18 31 - use ascending order for columns 18 to 31 (and these columns could be used to hold first names)
4. Some Line Commands (typed in the prefix area on the left)
Note: the line commands are not case sensitive as well.
The commands that consist of two repeating adjoining characters, like mm and oo, operate on ranges (blocks) of records they are entered twice, at the first and the last record of a range.
The commands that consist of two repeating adjoining characters, like mm and oo, operate on ranges (blocks) of records they are entered twice, at the first and the last record of a range.
- cols (can be entered on any line, apart from the top, which contains "******" in the prefix area)
-
inserts a ruler right above that line, and unlike the COLS primary command, this ruler will move with the data when scrolling;
to remove a particular ruler, enter D in its prefix area (at =COLS>) and hit Enter;to remove all the moving rulers at once, use the RES primary command - c (copy)
-
used to indicate a record to be copied to another place (with a or b)
(similar to :y in vim) - m (move)
-
used to indicate a record to be moved to another place (with a or b)
(somewhat similar to :d in vim) - mm
- used to mark a range of records for moving; just type mm at the first record and another mm at the last one (do not press Enter yet), now type a or b at the line prefix of a record you would like to move to, after that, finally, press Enter
- a (after) and b (before)
-
both a and b work in conjunction with the c, m and mm line commands,
they mark a record, after or before which copying or moving should occur
(it is somewhat similar to :put and :put!, respectively, in vim)
- o (overlay)
- used to indicate a record to be overlaid, it works in conjunction with the c or m line commands which indicate a record which should be used as "the top layer"
- oo (overlay for multiple records)
- this command is similar to the previous one, but allows to mark a range of records to be overlaid (by entering oo at the first and the last record of that range)
- i (insert)
-
provides the space for inserting a new record by typing it in (right beneath the i), hit Enter when you're done typing the new record to actually insert it
(it is somewhat similar to :i in vim) - r (repeat)
-
duplicates the record by inserting the copy right under it
(similar to :t. or :copy. in vim) - d (delete)
- deletes the record (similar to :d in vim)
- xx (exclude)
-
If there is a range of records that you want to be ignored when using the FIND and CHANGE commands, as well as hide it from the view, you can exclude it by marking the first and the last record of that range with the xx line command;
you'd need to use the NX flag to tell the CHANGE command to ignore the excluded records,for example, to change all non-excluded instances of AAA to BBB you'd use the following primary command:
C AAA BBB NX ALL
to unexclude all the excluded records, you can use the RES primary command;
to unexclude a particular record you can use the s line command- uc
- converts characters to uppercase
- lc
- converts characters to lowercase
- ((
- used to indicate a range of records for shifting 2 columns to the left;
you can append a number after the round brackets, like this ((8, to shift 8 columns instead;(similarly to other commands that act on a range of records, you need to type it twice, at the first and the last record of that range)- ))
- an opposite of the previous command, this one will shift to the right
Note you can append a number to many line commands to indicate that you want the action to be performed on a number of records instead of only one. For example, to copy 5 consecutive records type c5 This page was last updated on May 20, 2025No comments have been posted so far
